Start Your Day Right with Fluffy Greek Yogurt Pancakes
Welcome to a new morning ritual! These fluffy Greek yogurt pancakes are not just any pancakes; they’re a delightful blend of taste and nutrition that will elevate your breakfast game. Made with simple ingredients and a few easy steps, this recipe is perfect for busy weekdays or leisurely weekends. Let’s dive into the world of pancakes that are not only delicious but also packed with the goodness of Greek yogurt!
Why You’ll Love This Recipe
- Quick and Easy: With only a few simple steps, these pancakes come together in no time, making them ideal for busy mornings.
- Nutritious Boost: The addition of Greek yogurt adds protein to your meal, keeping you full and satisfied longer.
- Customizable: Easily adapt the recipe with your favorite mix-ins or toppings to suit your taste.
- Kid-Friendly: Light and fluffy, these pancakes are sure to win over even the pickiest eaters.
- Perfect for Meal Prep: Make a batch ahead of time and freeze them for quick breakfasts on the go!
Ingredient Breakdown
Let’s take a closer look at the ingredients needed to make these delightful pancakes:
- 1 cup all-purpose flour: A basic pantry staple for structure.
- 2 tablespoons sugar: For a touch of sweetness; you can substitute with honey or maple syrup.
- 2 teaspoons baking powder: This is the leavening agent that gives your pancakes that fluffy texture.
- ¼ teaspoon salt: Enhances the overall flavor of the pancakes.
- 1 cup Greek yogurt: The star ingredient! Use plain Greek yogurt for a rich texture.
- ¼ cup milk or water: Adjust the consistency to your liking; non-dairy milk works too!
- 2 large eggs: Adds moisture and richness to the batter.
- 1 teaspoon vanilla extract: For a hint of warmth and flavor.
- 2 tablespoons melted butter or oil: Helps achieve that perfect golden-brown crust.
How to Make Greek Yogurt Pancakes
Follow these simple steps for perfect pancakes every time:
- In a small bowl, whisk together the flour, sugar, baking powder, and salt.
- In a medium bowl, whisk together the Greek yogurt, milk, eggs, vanilla extract, and melted butter until smooth.
- Pour the dry ingredients into the wet ingredients and whisk until JUST combined. Don’t worry about lumps; they’re okay!
- Heat a large nonstick pan over medium heat for about 60-90 seconds. Lightly grease the surface with oil or butter.
- Pour ¼ cup of pancake batter onto the pan. Cook for about 2 minutes until the edges start to dry and bubbles form on the surface.
- Flip and cook for another 1-2 minutes until golden brown. Repeat with the remaining batter, greasing the pan as needed.
- Serve warm with butter, maple syrup, or your favorite toppings!
Pro Tips for Perfect Pancakes
- Don’t Overmix: A few lumps in the batter are perfectly fine—overmixing can lead to tough pancakes.
- Temperature Control: Ensure your pan is hot enough before pouring the batter; this helps achieve a nice golden color.
- Greasing the Pan: Use a paper towel to spread oil or butter evenly for a non-stick surface.
- Keep Warm: If making a large batch, keep cooked pancakes warm in a low oven (200°F) until ready to serve.
- Experiment with Flavors: Add spices like cinnamon or nutmeg to the batter for an extra flavor boost.
- Use Fresh Ingredients: Fresh baking powder will yield better results, so check the expiration date!
- Test the First Pancake: The first pancake is often a test to gauge your pan’s heat; adjust accordingly!
- Let the Batter Rest: Allowing the batter to rest for about 5 minutes can improve texture.
- Save Leftovers: Store any leftover pancakes in an airtight container in the fridge or freezer for later!
Common Mistakes and Troubleshooting
Even the best cooks can face challenges. Here are some common pancake pitfalls and how to avoid them:
- Pancakes are tough: This often happens due to overmixing the batter. Remember, lumps are okay!
- Burnt pancakes: If your pancakes are burning, lower the heat. Cooking them too fast can cause uneven browning.
- Pancakes are too dense: This can be a result of too much flour or not enough leavening. Ensure your baking powder is fresh!
- Sticking to the pan: Ensure your pan is adequately greased and preheated before pouring the batter.
Delicious Variations to Try
Feeling adventurous? Here are some fun variations to make your pancakes even more exciting:
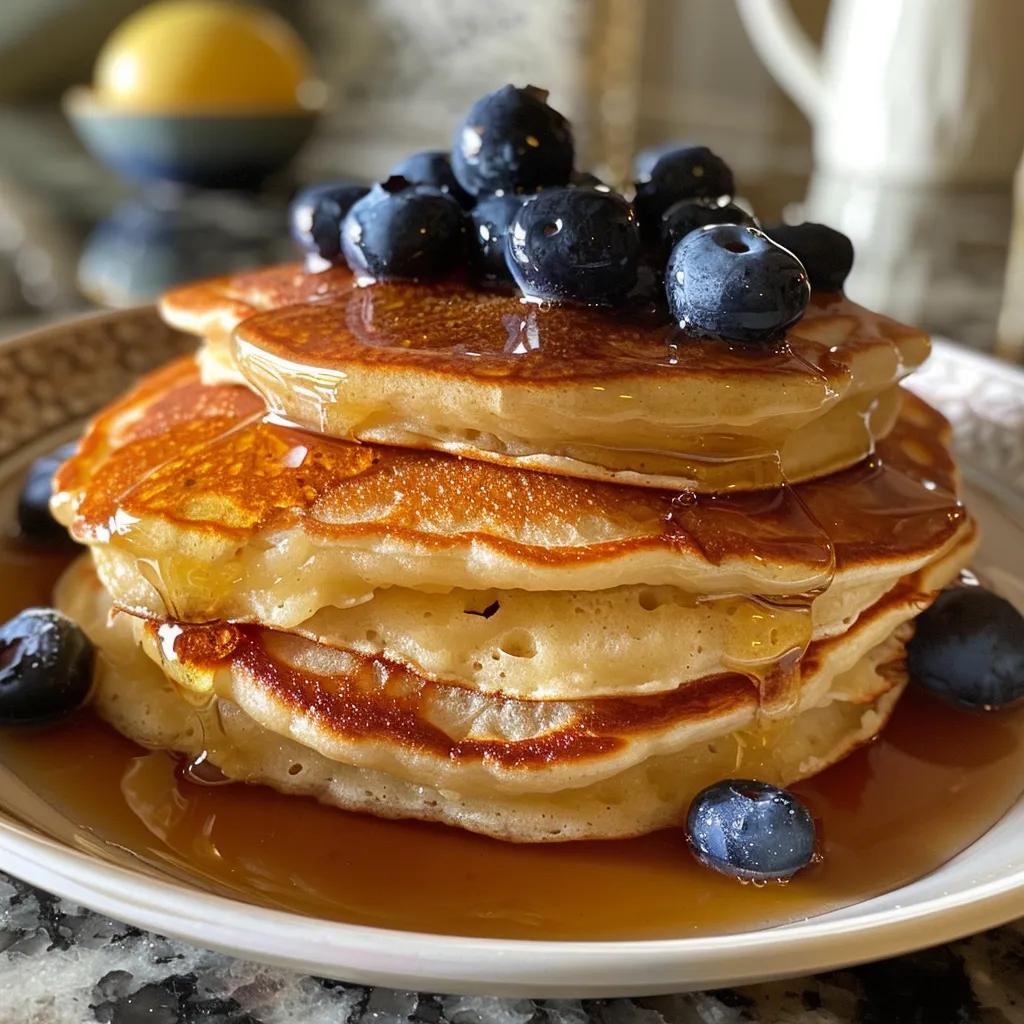
- Blueberry Greek Yogurt Pancakes: Fold fresh or frozen blueberries into the batter for a fruity twist.
- Chocolate Chip Pancakes: Add a handful of chocolate chips to the batter for a sweet treat.
- Banana Pancakes: Mash a ripe banana and incorporate it into the wet ingredients for a naturally sweet flavor.
- Nutty Pancakes: Stir in chopped nuts or seeds for added crunch and nutrition.
Storage and Make-Ahead Instructions
Want to make these pancakes ahead of time? Here’s how:
- Refrigerator: Store cooked pancakes in an airtight container in the fridge for up to 3 days.
- Freezer: Freeze pancakes between layers of parchment paper in a freezer-safe bag for up to 2 months.
- Reheating: Reheat pancakes in the microwave for about 30 seconds or on a skillet over low heat until warmed through.
Frequently Asked Questions (FAQ)
- Can I use whole wheat flour instead of all-purpose flour? Yes, you can substitute whole wheat flour, but it may change the texture slightly.
- What can I substitute for sugar? You can use honey or maple syrup; adjust the liquid ingredients accordingly.
- Are these pancakes gluten-free? Substitute the flour with a gluten-free blend to make them gluten-free.
- Can I make the batter ahead of time? Yes, but for best results, use the batter immediately after mixing.
- What toppings pair well with these pancakes? Try fresh fruits, whipped cream, yogurt, or your favorite syrup!
- Can I add protein powder to the batter? Yes, you can add a scoop of protein powder for an extra protein boost.
- How do I ensure my pancakes are fluffy? Make sure not to overmix the batter and use fresh baking powder.
- Can I make mini pancakes? Absolutely! Just reduce the batter amount for smaller sizes.
Nutrition Tips and Dietary Adaptations
Boost your pancakes nutritionally with these tips:
- Healthy Fats: Use avocado oil instead of butter for a healthier fat option.
- Low-Calorie Options: Substitute Greek yogurt with low-fat or non-fat options.
- Vegan Adaptation: Replace eggs with flaxseed meal and use plant-based yogurt for a vegan-friendly version.
Essential Equipment for Perfect Pancakes
Here’s what you’ll need to make your pancake-making experience seamless:
- Mixing Bowls: A set of different sizes for mixing dry and wet ingredients.
- Whisk: A good whisk is essential for combining ingredients smoothly.
- Nonstick Skillet: Ideal for cooking pancakes evenly without sticking.
- Measuring Cups and Spoons: Accurate measurements are key to pancake success!
- Spatula: A flexible spatula helps in flipping the pancakes without breaking them.
Serving Suggestions
These pancakes are versatile and can be served in numerous ways. Here are some ideas:
- Classic: Serve with butter and maple syrup for the traditional experience.
- Fruity: Top with fresh fruits like strawberries, bananas, or blueberries for a refreshing touch.
- Nutty: Add a sprinkle of chopped nuts or seeds for extra crunch.
- Yogurt Topping: A dollop of Greek yogurt on top adds creaminess and protein.
Now that you have all the tips, tricks, and variations, it’s time to grab those ingredients and get cooking! Enjoy your fluffy Greek yogurt pancakes, and remember, cooking is all about having fun and experimenting. Happy cooking!
Greek Yogurt Pancakes
Ingredients
Dry ingredients
- 1 cup all-purpose flour
- 2 tablespoons sugar
- 2 teaspoons baking powder
- ¼ teaspoon salt
Wet ingredients
- 1 cup Greek yogurt (plain)
- ¼ cup milk or water
- 2 large eggs
- 1 teaspoon vanilla extract
- 2 tablespoons melted butter or oil
Instructions
- Whisk together dry ingredients in a bowl.
- Mix wet ingredients in a separate bowl.
- Combine wet and dry ingredients until just mixed.
- Heat a nonstick pan, grease lightly, and pour ¼ cup batter for each pancake. Cook until bubbles form, then flip and cook until golden.
- Repeat with remaining batter, greasing the pan as needed.
- Serve warm with toppings of your choice.