
![['Close-up of a textured pile of quinoa flour in a wooden bowl.', 'Side view of light-colored quinoa flour on a dark surface.', 'Quinoa flour showcased in a well-lit kitchen setting.', 'A small heap of quinoa flour with whole quinoa seeds beside it.']](https://simpleflavoria.com/wp-content/uploads/2026/07/quinoa-flour_1_U1.webp "Unlocking the Secrets to Smooth, Non-Bitter Quinoa Flour")
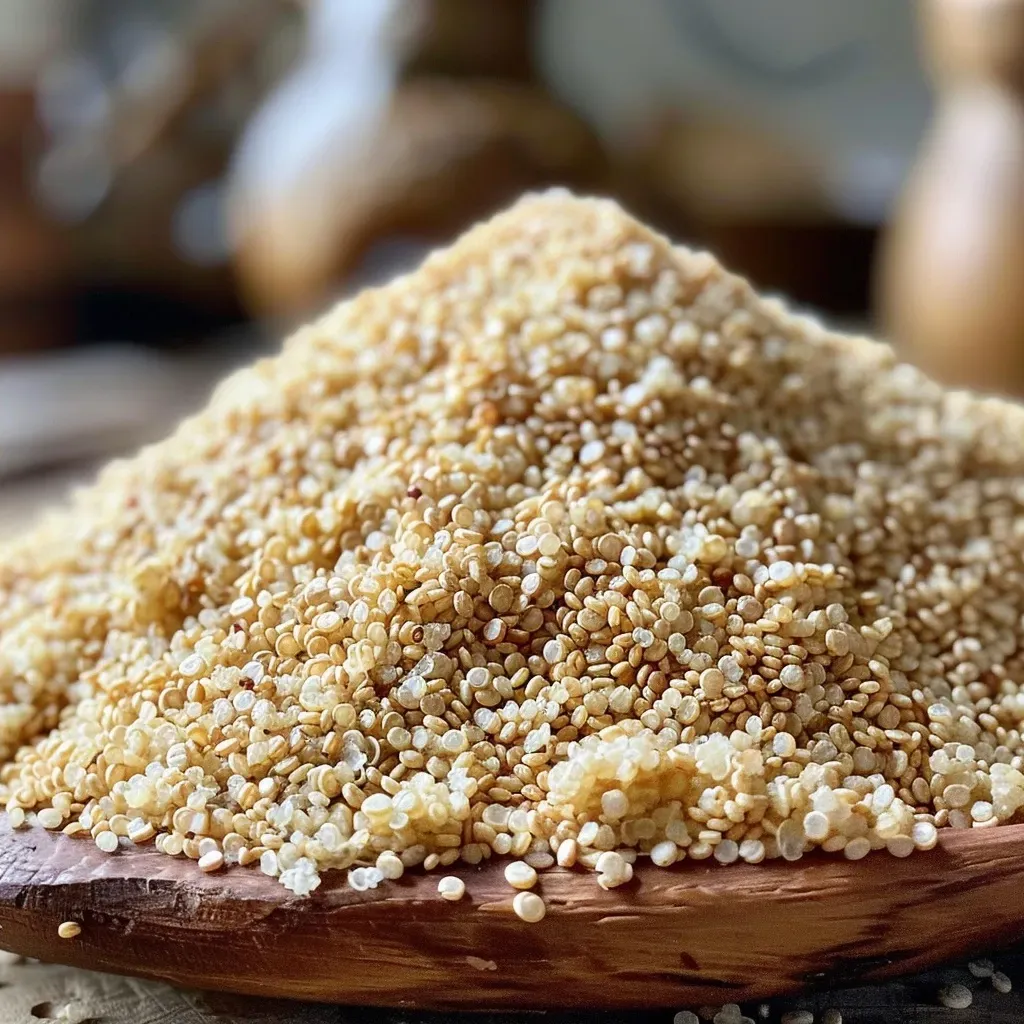
Quinoa flour is one of the most versatile and nutritious gluten-free alternatives to traditional wheat flour. If you’re looking to explore new culinary horizons, making your own quinoa flour at home can be a game changer! In this guide, we’ll dive deep into how to create smooth, non-bitter quinoa flour using just two cups of quinoa. Not only will we cover the step-by-step process, but I’ll also share tips, tricks, and variations to elevate your cooking. Let’s get started!
Why You’ll Love This Recipe
Here are five reasons why making your own quinoa flour is a fantastic choice:
- Flavorful and Nutty: Homemade quinoa flour brings a rich, nutty flavor that enhances your baked goods and dishes.
- Cost-Effective: Buying quinoa flour can be pricey; making it at home saves you money and ensures freshness.
- Gluten-Free Goodness: This flour is perfect for those avoiding gluten while still wanting to enjoy delicious baked treats.
- High in Protein: Quinoa flour is packed with protein, making it an excellent choice for health-conscious eaters.
- Customizable: You can easily adjust the texture and flavor by toasting or rinsing your quinoa before grinding.
Ingredients Breakdown
To make smooth quinoa flour, you only need one ingredient:

★ Recommended Kitchen Tool
Professional Chef Knife Set
Make this recipe even easier with a quality Professional Chef Knife Set — a must-have kitchen staple!
- 2 cups of quinoa: Choose high-quality, organic quinoa for the best flavor. You can use white, red, or black quinoa depending on your preference.
Looking for substitutions? Here are some alternatives:
- Millet or Buckwheat: Both are great gluten-free options with unique flavors, though they will alter the taste of your final product.
- Chickpea Flour: For a different protein boost, chickpea flour can be used, but it has a distinct flavor.
How to Make Quinoa Flour
Creating your own quinoa flour is simple and can be done in a few easy steps:
Step-by-Step Instructions
- Rinse the Quinoa: Start by rinsing your quinoa under cold water to remove the natural saponins, which can impart a bitter taste. Rinse thoroughly until the water runs clear.
- Dry the Quinoa: Spread the rinsed quinoa on a clean kitchen towel or baking sheet and let it dry completely. This step is crucial to prevent clumping.
- Blend Until Fine: Transfer the dried quinoa to a high-speed blender or food processor. Blend until you achieve a fine flour consistency. This usually takes about 1-2 minutes.
- Store Properly: Store your quinoa flour in an airtight container in a cool, dry place. For extended shelf life, refrigerate or freeze.
Pro Tips for Success
Here are some expert insights to ensure your quinoa flour turns out perfectly:
- Toast for Flavor: If you prefer a richer taste, toast the quinoa in a dry skillet over medium heat for 5-7 minutes before blending.
- Check Consistency: If the flour isn’t fine enough after blending, sift it and return any coarse bits to the blender for a second round.
- Use in Recipes: Quinoa flour can be used to make pancakes, cookies, and even gluten-free pasta. Just remember it’s best mixed with other flours for structural integrity.
- Experiment with Ratios: When substituting quinoa flour for regular flour in recipes, start with 1:4 ratio and adjust based on desired texture.
- Mix with Starch: For baking, combine quinoa flour with starches like tapioca or cornstarch to improve the texture of your baked goods.
- Common Mistake: Avoid over-blending, as this can heat the flour and create a more bitter taste.
- Storage Tip: Always keep quinoa flour in a dark, cool place to maintain its freshness.
- Label Containers: If you’re making multiple types of flour, ensure you label your containers to avoid confusion.
Variations to Try
Making quinoa flour opens up a world of possibilities! Here are four variations to consider:
- Spiced Quinoa Flour: Add spices like cinnamon or vanilla bean before blending for a fragrant twist.
- Nutty Quinoa Blend: Blend quinoa with nuts like almonds or cashews for a protein-rich flour that’s perfect for baking.
- Herbed Flour: Incorporate dried herbs like rosemary or thyme for a savory flour that can elevate breads and crackers.
- Flavored Quinoa Flour: Add cocoa powder or matcha during blending to create flours that are perfect for desserts.
Storage and Make-Ahead Instructions
To make your cooking process easier, consider these tips for storing your quinoa flour:
- Airtight Containers: Store quinoa flour in airtight containers to keep out moisture and pests.
- Refrigeration: To extend shelf life, refrigerate the flour. It can last up to six months when stored this way.
- Freezing: For longer-term storage, quinoa flour can be frozen for up to a year. Ensure it’s in a sealed container to prevent freezer burn.
- Thawing: When ready to use, simply take out the desired amount and let it come to room temperature.
Frequently Asked Questions
Got questions? Here are some common inquiries about quinoa flour:
- Is quinoa flour gluten-free? Yes, quinoa flour is entirely gluten-free, making it a safe choice for those with celiac disease or gluten intolerance.
- Can you use quinoa flour as a 1:1 substitute for all-purpose flour? Not exactly. It’s best used in combination with other flours for optimal texture.
- What recipes can I make with quinoa flour? You can create pancakes, cookies, muffins, and even pasta with quinoa flour!
- How do I prevent a bitter taste? Rinsing and drying the quinoa thoroughly helps eliminate the bitter flavor. Toasting can also enhance flavor.
- Can I use quinoa flour for bread? Yes, but it’s best mixed with other gluten-free flours to ensure the bread rises properly.
- How do I know if my quinoa flour is good? Fresh quinoa flour should smell nutty and earthy. If it has a rancid smell, it’s best to discard it.
- How long does quinoa flour last? When stored properly, quinoa flour can last up to six months in the refrigerator or up to a year in the freezer.
- Can I make quinoa flour in a regular blender? Yes, but a high-speed blender or a grain mill produces the best texture.
Nutrition Tips and Dietary Adaptations
Quinoa flour is not just versatile; it’s also packed with nutrients! Here are some nutritional benefits:
- High in Protein: Quinoa flour contains all nine essential amino acids, making it a complete protein source.
- Rich in Nutrients: It’s high in fiber, magnesium, and iron, contributing to a balanced diet.
- Low Glycemic Index: Quinoa flour has a lower glycemic index compared to traditional flours, making it suitable for blood sugar control.
Equipment Recommendations
To successfully make quinoa flour, consider having the following equipment:
- High-Speed Blender: A quality blender ensures a smooth consistency.
- Fine Mesh Sieve: For sifting the flour to achieve the perfect texture.
- Baking Sheet: Use it to dry the rinsed quinoa thoroughly.
Serving Suggestions
Now that you’ve mastered quinoa flour, here are a few serving suggestions:
- Pancakes: Use quinoa flour to whip up a stack of fluffy pancakes, topped with fresh fruit and maple syrup.
- Cookies: Bake delicious cookies that are crispy on the outside and soft inside.
- Pasta: Create homemade gluten-free pasta that pairs beautifully with your favorite sauces.
- Bread: Experiment with gluten-free bread recipes for a wholesome loaf that everyone will love.
Remember, cooking is about creativity and experimentation. Don’t hesitate to try different recipes and enjoy the fantastic flavors that quinoa flour has to offer!
Conclusion
With this comprehensive guide, you’re ready to embrace the world of quinoa flour! By making it at home, you can enjoy its nutty flavor and health benefits while customizing it to suit your culinary needs. So, roll up your sleeves, gather your ingredients, and start creating delicious, gluten-free meals that your friends and family will rave about. Happy cooking!
How to Make Quinoa Flour With No Bitter Taste
Ingredients
Main
- 2 cups quinoa (rinsed and drained)
Instructions
-
Rinse the quinoa thoroughly to remove bitterness.
-
Drain and spread the quinoa on a baking sheet.
-
Toast the quinoa in a preheated oven at 350°F (175°C) for 5-7 minutes until dry and fragrant.
-
Allow to cool, then blend in a food processor until fine flour forms.
-
Sift the flour to remove any larger particles and store in an airtight container.

![['Close-up view of a bowl of colorful Vegetable Quinoa Soup with visible vegetables and quinoa.', 'Side view of Vegetable Quinoa Soup featuring vibrant carrots, celery, and leafy spinach.', 'Detailed shot of a hearty Vegetable Quinoa Soup, showcasing its rich textures and ingredients.', 'Appetizing image of Vegetable Quinoa Soup in a bowl, highlighting the blend of fresh vegetables and grains.']](https://simpleflavoria.com/wp-content/uploads/2026/07/vegetable-quinoa-soup_1_U1-150x150.webp)
![['Close-up view of marinated chicken breasts in a bowl.', 'Side view of juicy Mediterranean chicken marinade with fresh herbs.', 'Ingredients for Mediterranean chicken marinade displayed together.', 'Golden-brown grilled chicken marinated in Mediterranean flavors.']](https://simpleflavoria.com/wp-content/uploads/2026/07/u6426281249_close_up_photo_side_view_from_reddit._taken_with__689cff6c-685f-4998-8a5a-a56baec914a0_0-150x150.webp)