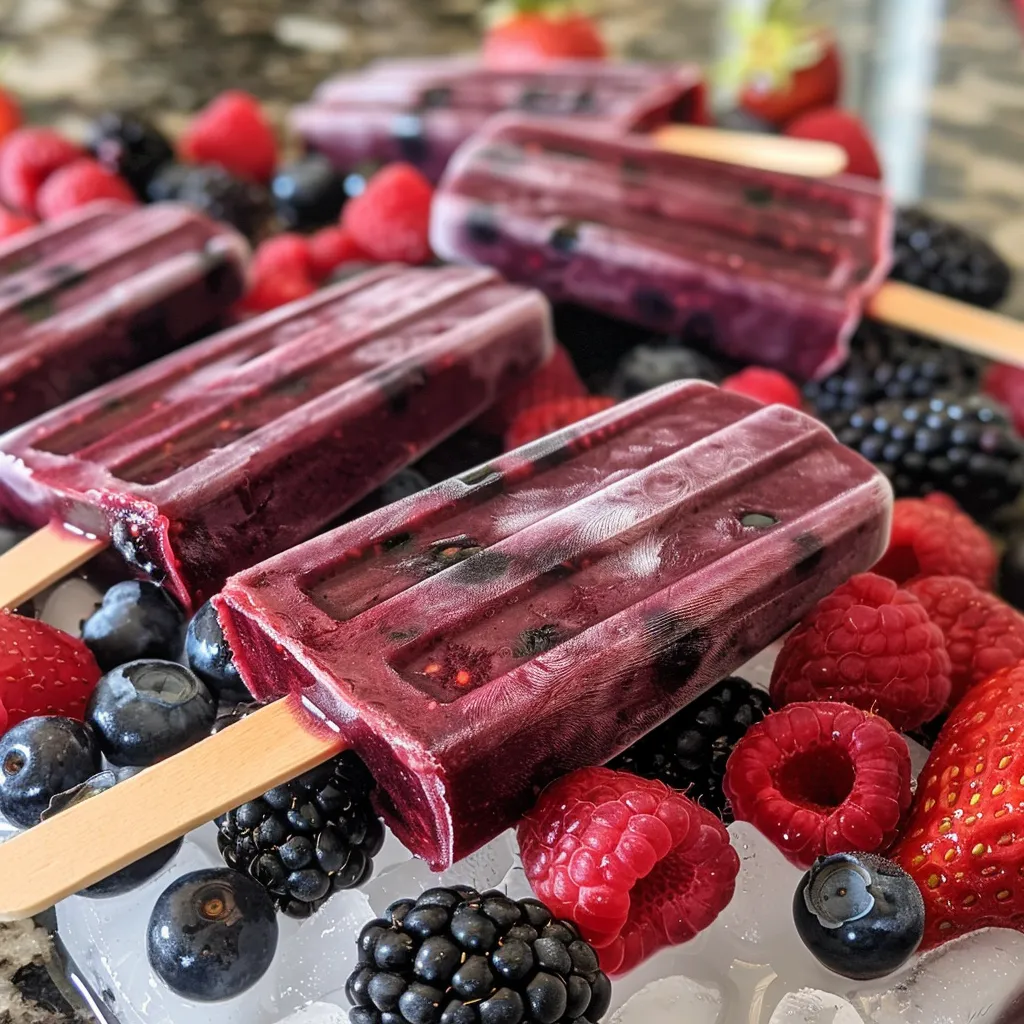
Beat the Heat with These Refreshing Mixed Berry Popsicles
Summer is here, and what better way to cool down than with homemade mixed berry popsicles? These delightful treats are not only easy to make but are also bursting with fresh flavors, making them a favorite for both kids and adults alike. In this article, we’ll explore how to create these delicious popsicles, dive into the health benefits of the ingredients, and provide tips to ensure your popsicles are a hit this summer.
Whether you’re lounging by the pool, having a picnic, or just looking for a sweet snack, these berry popsicles are the perfect solution. With just a few steps and simple ingredients, you’ll be well on your way to enjoying a refreshing summer treat!
Why You’ll Love This Recipe
- Quick and Easy: With only a handful of ingredients and steps, you can whip these up in no time!
- Healthy Snack: Made with fresh fruits, these popsicles are a great way to sneak some extra vitamins into your diet.
- Customizable: Feel free to substitute with your favorite berries or sweetness levels to make them your own.
- No Artificial Ingredients: Enjoy peace of mind knowing exactly what goes into your popsicles.
- Fun for All Ages: Kids love helping out in the kitchen, and making these treats together can be a great bonding activity!
Ingredients Breakdown
Let’s take a closer look at what you’ll need to make these mixed berry popsicles:
- 1 cup raspberries: Fresh or frozen, these berries provide a tangy flavor.
- 1 cup blueberries: Sweet and nutritious, blueberries are packed with antioxidants.
- 1 cup blackberries: These add a rich color and flavor to your popsicles.
- 2 cups sliced strawberries: Strawberries are sweet and juicy, making them a favorite in many recipes.
- 6 Tablespoons simple syrup: Adjust according to taste; you can use honey or agave syrup for a twist!
- 2 Tablespoon lemon juice: A splash of citrus brightens the flavor of the berries.
Pro Tips for Perfect Popsicles
- Mixing Techniques: Blend until smooth for a uniform texture, or pulse gently for a chunkier bite.
- Adjust Sweetness: Not all fruits have the same sweetness—taste the mixture before pouring it into molds.
- Layering Flavors: Try layering different fruit purees for a stunning visual effect.
- Mold Preparation: Lightly spray popsicle molds with cooking spray for easy removal.
- Time Management: Freeze for at least four hours to ensure they set properly.
- Creative Add-ins: Consider adding coconut water for hydration or mint leaves for a refreshing twist.
- Storage Tips: Wrap popsicles in plastic wrap to prevent freezer burn.
- Serving Suggestions: Serve with fresh fruit or yogurt for added texture and flavor.
Common Mistakes and Troubleshooting
Don’t let a few bumps in the road deter your frozen creations! Here are common mistakes and how to avoid them:
- Popsicles Won’t Come Out: Ensure the molds are adequately sprayed or run under warm water for a few seconds.
- Too Sweet or Not Sweet Enough: Always taste the mixture before freezing and adjust the simple syrup accordingly.
- Ice Crystals Forming: Make sure to blend the mixture well and freeze in an airtight container.
- Flavor Not Bold Enough: If your popsicles lack flavor, try adding a pinch of salt or a splash more lemon juice.
Delicious Variations to Try
Need some inspiration? Here are some fun variations on the classic mixed berry popsicles:
- Coconut Berry Popsicles: Substitute simple syrup with coconut water for a tropical twist.
- Yogurt Swirl Popsicles: Add a layer of yogurt for creaminess and extra protein.
- Minty Berry Popsicles: Blend in fresh mint leaves for a refreshing herbal note.
- Chocolate-Dipped Popsicles: Dip frozen pops in melted dark chocolate for a decadent finish.
Storage and Make-Ahead Instructions
These popsicles can be made in advance, making them perfect for hot days ahead. Here’s how to store them:
- Freezer Storage: Store popsicles in the freezer for up to 2 months.
- Air-tight Containers: Use freezer-safe bags or containers to prevent freezer burn.
- Thawing: Allow popsicles to sit at room temperature for a few minutes before attempting to remove them from the molds.
Frequently Asked Questions
Here are some common questions that might arise when making your mixed berry popsicles:
- Can I use frozen berries? Yes, frozen berries work just as well and can be a convenient option.
- How do I make them less sweet? Reduce the amount of simple syrup or use naturally sweet fruits.
- Can I add other fruits? Absolutely! Feel free to experiment with your favorite fruits.
- What’s the best way to remove popsicles from molds? Run warm water over the outside of the mold for easy release.
- How long can I store them? Up to 2 months in an airtight container in the freezer.
- Can I add alcohol? Yes, for adult versions, add a splash of your favorite liqueur!
- What if my popsicles are too icy? This may happen if they weren’t blended enough; ensure a smooth mixture.
- How do I make a layered popsicle? Freeze one layer before adding the next for a beautiful effect.
Nutrition Tips and Dietary Adaptations
These popsicles can be tailored to meet various dietary needs:
- Low Sugar: Use stevia or a sugar substitute in place of simple syrup.
- Dairy-Free: Use coconut yogurt for a vegan-friendly option.
- Gluten-Free: Naturally gluten-free as they contain no wheat products.
- High Protein: Incorporate Greek yogurt into your mixture for added protein.
Essential Equipment for Making Popsicles
To create the perfect mixed berry popsicles, you’ll need:
- Popsicle Molds: Choose silicone molds for easy removal.
- Blender or Food Processor: A high-powered blender will ensure a smooth mixture.
- Measuring Cups: Essential for accurate ingredient measurements.
- Spatula: For scraping down the sides of your blender for a thorough mix.
Serving Suggestions
Serve these refreshing popsicles in a variety of fun ways:
- With Fresh Fruit: Pair with a side of fresh berries or sliced fruit for a colorful plate.
- With Yogurt: Serve alongside a scoop of yogurt for a delicious breakfast option.
- On a Stick: Insert popsicle sticks for easy handling and fun presentation.
- At Parties: Create a popsicle bar with toppings like granola, coconut flakes, and nuts.
In conclusion, making mixed berry popsicles at home is not only a rewarding cooking experience but also a delicious way to enjoy fresh fruits during the summer months. With the guidelines and tips provided, you’re now equipped to create your own popsicles that will impress family and friends. So grab those berries, fire up your blender, and get ready to enjoy a cool, fruity treat that’s sure to make your summer even sweeter!
Mixed Berry Popsicles
Ingredients
Fruits
- 1 cup raspberries
- 1 cup blueberries
- 1 cup blackberries
- 2 cups sliced strawberries
- 6 Tablespoons simple syrup (or more to taste)
- 2 Tablespoons lemon juice
Instructions
- Puree all berries in a blender or food processor.
- Add simple syrup and lemon juice; blend until combined.
- Divide mixture into popsicle molds.
- Insert sticks and freeze for at least four hours.