Beat the Heat with Delicious Frozen Banana Yogurt Pops
Summer is here, and what better way to cool down than with a refreshing treat? Our Frozen Banana Yogurt Pops are the perfect combination of healthy and delicious, making them a hit for both kids and adults alike. With just three simple ingredients—bananas, yogurt, and your favorite toppings—these pops are not only easy to make but also a fun way to enjoy a sweet snack. Let’s dive into why you’ll love these delightful treats and how to make them in your own kitchen!
Why You’ll Love This Recipe
- Healthier alternative: These frozen treats provide a guilt-free way to satisfy your sweet tooth, using natural ingredients instead of processed sugars.
- Quick to prepare: In just a few steps, you can whip up these pops, making them a perfect last-minute dessert for unexpected guests or hot days.
- Kid-friendly fun: Involve your little ones in the kitchen! They’ll love dipping bananas in yogurt and choosing toppings.
- Customizable: You can easily switch up the yogurt flavor or toppings to suit your taste preferences or dietary needs.
- Perfect for meal prep: Make a batch ahead of time and enjoy these pops throughout the week as a healthy snack.
Ingredients Breakdown
Here’s what you’ll need to make these amazing Frozen Banana Yogurt Pops:
- 3 bananas: Peeled and cut in half. Choose ripe bananas for a sweeter flavor.
- 3/4 cup vanilla yogurt: You can use plain or flavored yogurt, including dairy-free options like coconut or almond yogurt.
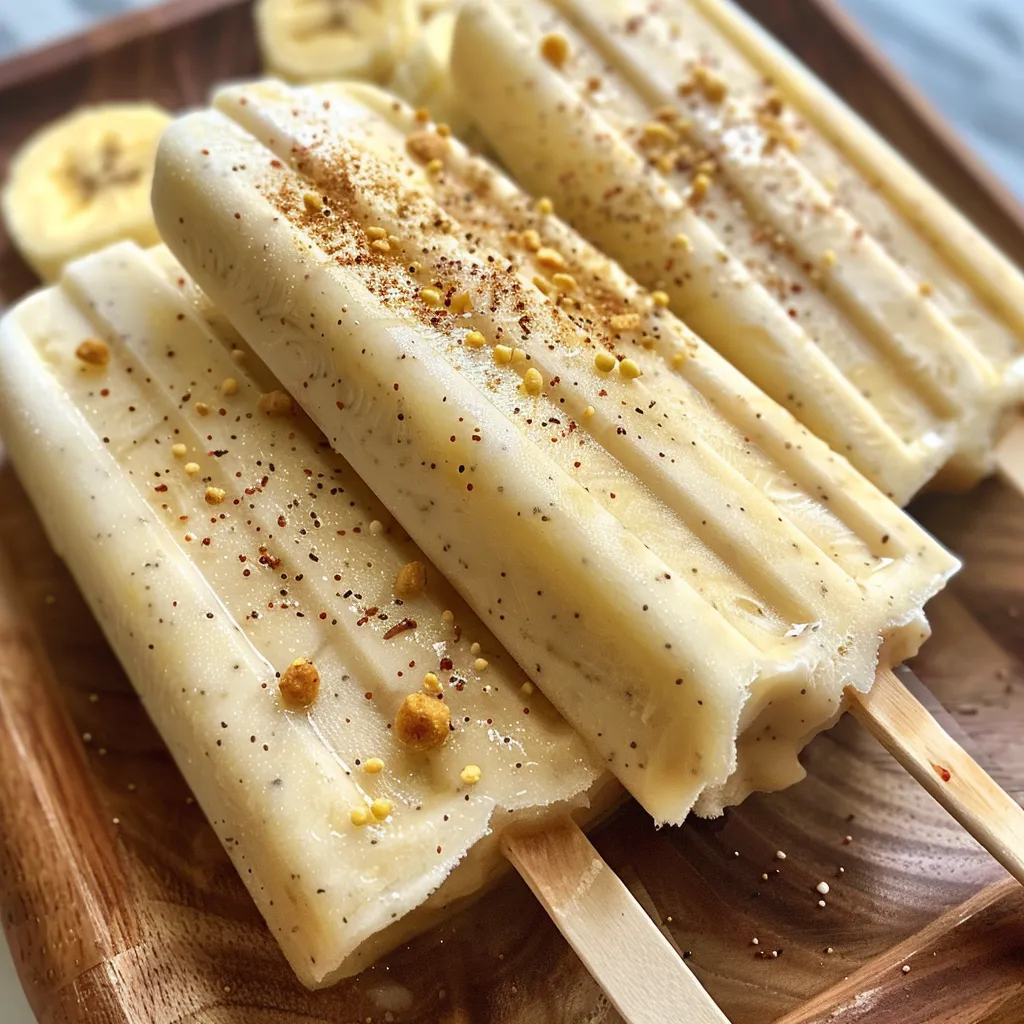
- Sprinkles or toppings: Get creative! Try nuts, seeds, shredded coconut, or mini chocolate chips to add texture and fun.
- Popsicle sticks: Essential for holding your pops together. You can also use bamboo skewers for a fun twist.
How to Make Frozen Banana Yogurt Pops
Making these yummy pops is as easy as 1-2-3! Follow these simple steps:
- Step 1: Halve and peel each banana. Insert a popsicle stick into each banana half. This is where the magic begins!
- Step 2: Dip the bananas into yogurt. Use a spoon to coat each banana evenly, ensuring it’s well-covered.
- Step 3: Let any excess yogurt drip off, then add your chosen sprinkles or toppings.
- Step 4: Place the bananas on a plate covered in wax or parchment paper to prevent sticking.
- Step 5: Freeze until the yogurt has hardened, about 2 hours. If you prefer a solid frozen banana, allow for more time.
Pro Tips for the Best Results
To ensure your pops turn out perfectly every time, consider these expert insights:
- Choose the right bananas: Slightly overripe bananas work best as they are sweeter and creamier.
- Use full-fat yogurt: For a creamier texture, opt for full-fat Greek yogurt, which also adds protein!
- Experiment with flavors: Try adding a little honey, maple syrup, or vanilla extract to the yogurt for extra flavor.
- Prevent freezing issues: If your pops freeze too hard, let them sit at room temperature for a few minutes before enjoying.
- Mix and match toppings: The possibilities are endless—consider crushed nuts, fresh berries, or even granola for crunch!
- Try different molds: If you have popsicle molds, feel free to use them for fun shapes and sizes.
- Presentation matters: Serve your pops on a colorful plate and add a drizzle of chocolate for a stunning finish.
- Store properly: Wrap individual pops in plastic wrap for easy storage and to prevent freezer burn.
Common Mistakes and Troubleshooting
Here are some common pitfalls to avoid when making your frozen yogurt pops:
- Yogurt not sticking: If the yogurt doesn’t adhere well, try chilling your bananas before dipping them.
- Too icy: If your pops turn out too icy, it may be because they were frozen too quickly. Consider letting them freeze gradually.
- Bananas browning: If you want to keep your pops looking fresh, use a splash of lemon juice on the bananas before freezing.
- Not sweet enough: If you find the pops not sweet enough, add a little honey or sugar to the yogurt.
Fun Variations to Try
Here are some tasty variations to shake things up:
- Chocolate-Dipped Banana Pops: Dip the yogurt-covered bananas in melted chocolate before freezing for a decadent treat.
- Berry Swirl: Mix in pureed berries with your yogurt before coating the bananas for a fruity twist.
- Peanut Butter Delight: Swirl in a spoonful of peanut butter into your yogurt for a nutty flavor.
- Breakfast Pops: Add oats and a drizzle of honey to the yogurt for a nutritious breakfast on a stick.
Storage and Make-Ahead Instructions
Want to make these pops ahead of time? Here’s how to store them:
- Freezing: Store your pops in an airtight container or wrap them individually in plastic wrap to keep them fresh.
- Thawing: To enjoy, let them sit at room temperature for a few minutes or run them under warm water for easy removal.
- Duration: These pops can be stored in the freezer for up to 2 months, but they’re best enjoyed within the first month for optimal flavor.
Frequently Asked Questions
Got questions? We’ve got answers! Here are some common inquiries about Frozen Banana Yogurt Pops:
- Can I use flavored yogurt? Absolutely! Flavored yogurts add a fun twist to your pops.
- Are these pops dairy-free? Yes, you can easily make them dairy-free by using non-dairy yogurt options.
- How do I prevent them from sticking? Use wax or parchment paper under the pops to prevent sticking during freezing.
- Can I make them into a healthy Halloween treat? Definitely! Use orange and black sprinkles for a festive touch.
- How long do they take to freeze? Allow about 2 hours for the yogurt to harden, but longer if you prefer them fully frozen.
- Can I use other fruits? Yes, try using strawberries or peaches for a fruity variety!
- How do I make them sweeter? Add honey or maple syrup to the yogurt for extra sweetness.
- What’s the best way to serve them? Serve them on a colorful plate, and don’t forget to add a drizzle of chocolate for extra flair!
Nutritional Benefits and Dietary Adaptations
These Frozen Banana Yogurt Pops are not just tasty; they’re packed with nutritional benefits:
- Rich in potassium: Bananas are great for heart health and muscle function.
- Good source of protein: Yogurt provides protein, which is essential for muscle repair and growth.
- Low in calories: These pops are a great way to satisfy your sweet cravings without the guilt.
- Customizable for diets: Easily adapt this recipe for vegan, gluten-free, or low-fat diets by choosing the right yogurt and toppings.
Equipment Recommendations
To make these pops, you’ll need a few basic kitchen tools:
- Popsicle molds: If you have them, they’re great for creating uniform pops.
- Mixing bowl: For mixing yogurt and toppings.
- Spatula: Helpful for coating bananas evenly with yogurt.
- Knife: To prepare your bananas easily and safely.
Serving Suggestions
These pops are best enjoyed with friends and family. Here are a few fun serving suggestions:
- Summer parties: Serve them at barbecues or pool parties as a refreshing dessert option.
- Playdate snacks: A hit with kids! Serve alongside fruit for a balanced snack.
- Movie nights: Make them into bite-sized pieces for a fun movie snack.
With these Frozen Banana Yogurt Pops, you can beat the heat and enjoy a delightful, healthy treat this summer. Remember, cooking is about exploration and enjoyment—so get creative with your flavors and toppings! Happy cooking!
Frozen Banana Yogurt Pops
Ingredients
Fruits
- 3 pieces bananas (peeled and cut in half)
- 0.75 cup vanilla yogurt (or flavor of your choice)
- as desired toppings sprinkles or toppings (of your choice)
- 4 pieces popsicle sticks
Instructions
- Insert a popsicle stick into each banana half.
- Dip bananas into yogurt, coating evenly; let excess drip off.
- Add sprinkles or toppings of your choice.
- Place on a plate covered with wax or parchment paper and freeze until hardened, about 2 hours.