Discover the Joy of Mini Brownies: A Bite-Sized Delight for Sweet Cravings
Welcome to the delightful world of mini brownies! If you’re looking for a quick, easy, and utterly satisfying treat, you’ve come to the right place. These rich, fudgy bites not only satisfy your sweet tooth but also bring a touch of joy to any occasion. Whether it’s a family gathering, a party, or just a cozy night in, mini brownies offer the perfect balance of flavor and convenience. In this comprehensive guide, I’ll walk you through everything you need to know to make these delicious treats, from the ingredients to expert tips, variations, and more. Let’s dive in!
Why You’ll Love This Recipe
Here are just a few reasons why these mini brownies will become your go-to recipe:
- Quick and Easy: With just a few simple steps, you can whip up these mini brownies in no time. Perfect for busy weekdays or last-minute gatherings.
- Perfect Portion Control: These bite-sized treats allow for indulging without overdoing it. Enjoy a little sweetness without the guilt!
- Rich Fudgy Flavor: The combination of semi-sweet chocolate and brown sugar creates a deep, rich flavor profile that will leave you craving more.
- Creative Toppings: Get creative with toppings! From chocolate drizzle to whipped cream, the possibilities are endless.
- Kid-Friendly Fun: Baking mini brownies can be a fun activity to do with kids. Let them help with mixing and decorating!
Ingredients Breakdown
Before we jump into the baking, let’s take a closer look at the ingredients you’ll need:
- Brown Sugar (1 3/4 Cup): This provides moisture and a rich flavor. You can substitute with coconut sugar for a healthier option.
- Butter (1/4 Cup): Adds richness. If you prefer a dairy-free version, use coconut oil or vegan butter.
- Semi-Sweet Chocolate (3 oz): Essential for that classic brownie taste. You can also use dark chocolate for a more intense flavor.
- Vanilla Extract (1/2 tsp): Enhances the overall flavor. Feel free to use pure vanilla for the best taste.
- Egg (1): Binds the ingredients together. For a vegan option, use a flax egg or applesauce.
- All-Purpose Flour (1 3/4 Cup): Gives structure. You can substitute with gluten-free flour if needed.
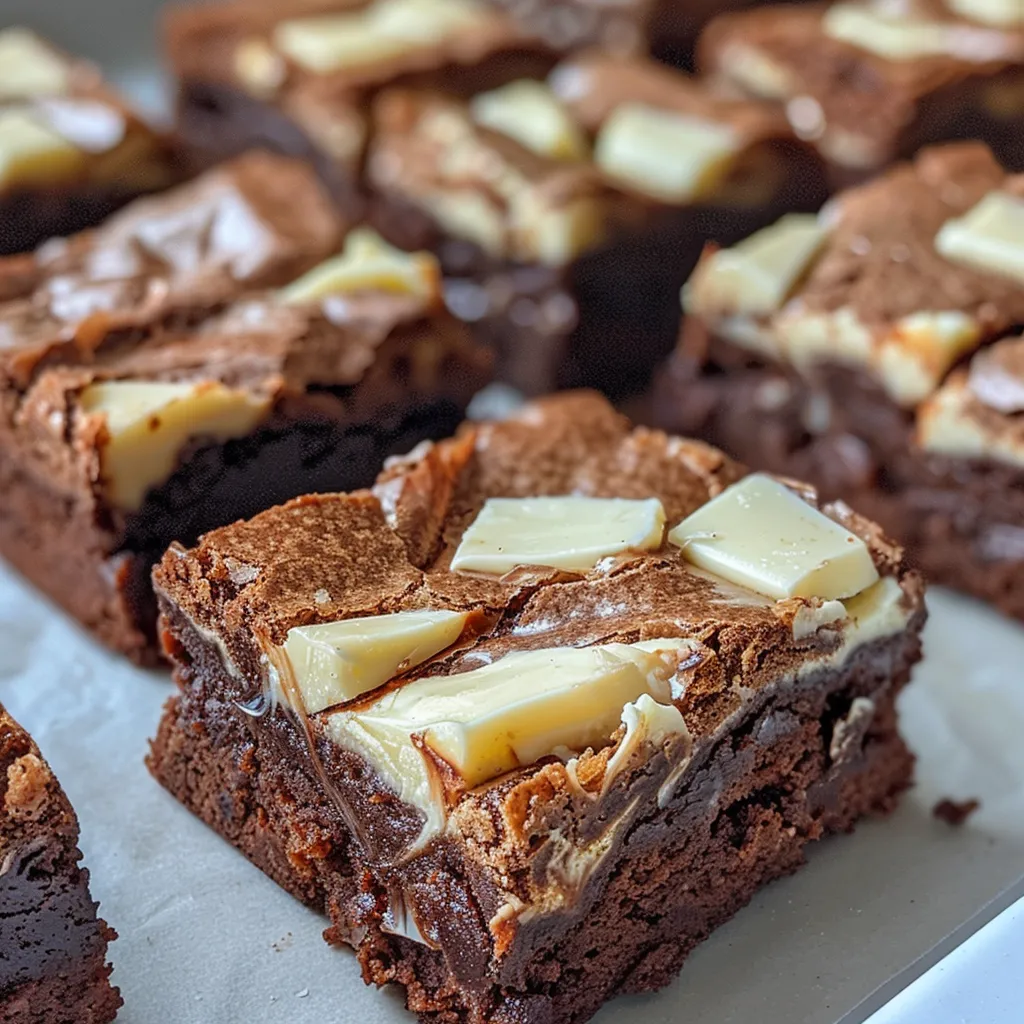
- White Chocolate (for drizzling): Optional but adds a lovely touch of sweetness and visual appeal.
How to Make Mini Brownies: Step-by-Step
Now that we have our ingredients, let’s get started with the baking process!
- Melt the Mixture: In a saucepan over low heat, melt the brown sugar, butter, and semi-sweet chocolate, stirring until smooth.
- Cool and Combine: Remove from heat and let cool for about 1 minute. Stir in the vanilla extract and egg until well incorporated.
- Fold in Flour: Gently fold in the flour until just combined. Avoid overmixing to keep the brownies fudgy.
- Prepare for Baking: Spoon the batter into small paper baking cups placed in a mini brownie pan.
- Bake: Bake at 350°F for 10-12 minutes, or until set. A toothpick should come out with a few moist crumbs.
- Cool Completely: Allow the mini brownies to cool in the pan before removing.
- Decorate: Melt white chocolate in a microwave-safe bag and drizzle it over the cooled brownies as desired.
Pro Tips for Perfect Mini Brownies
Here are some expert insights to help you achieve the best results:
- Don’t Overmix: Mix the batter just until combined to ensure a fudgy texture.
- Check for Doneness: Keep an eye on the baking time; overbaking can lead to dry brownies.
- Use Quality Chocolate: The better the chocolate, the better the flavor. Opt for high-quality semi-sweet chocolate.
- Experiment with Flavors: Add in some nuts, chocolate chips, or even a pinch of sea salt for an extra flavor boost.
- Chill Before Serving: Letting the brownies cool completely enhances the flavors and makes them easier to handle.
- Double the Batch: If you love these mini brownies (and you will!), consider doubling the recipe to share with friends!
- Storage: Store any leftovers in an airtight container at room temperature for up to 3 days.
- Make Ahead: You can prepare the batter a day in advance and bake when you’re ready!
Common Mistakes and Troubleshooting
Even the best bakers make mistakes! Here are some common pitfalls and how to avoid them:
- Dry Brownies: This often happens with overbaking. Keep an eye on your brownies and check for doneness a few minutes early.
- Too Crumbly: If your brownies are falling apart, they may lack enough moisture. Ensure you’re using the right amount of butter and sugar.
- Uneven Baking: Make sure your oven is properly preheated and consider using an oven thermometer to check accuracy.
- Sticking to the Pan: Use quality non-stick pans or line them with parchment paper to avoid sticking.
Variations to Try
Feeling adventurous? Here are some fun variations to elevate your mini brownies:
- Nutty Delight: Add chopped walnuts or pecans for added crunch and flavor.
- Mint Chocolate: Mix in peppermint extract and top with crushed mint candies for a refreshing twist.
- Peanut Butter Swirl: Drop spoonfuls of peanut butter into the batter before baking and swirl for a delicious combination.
- Cookie Dough Topping: Top with edible cookie dough before serving for a decadent dessert experience.
Storage and Make-Ahead Instructions
Want to enjoy these mini brownies later? Here’s how to store and prepare them ahead of time:
- Room Temperature: Store in an airtight container for up to 3 days.
- Refrigerator: For longer freshness, refrigerate for up to a week. Just let them come to room temperature before serving!
- Freezer: Freeze baked brownies in an airtight container for up to 3 months. Thaw in the fridge before enjoying.
- Make Ahead: Prepare the batter in advance, cover, and refrigerate for up to 24 hours before baking.
FAQs About Mini Brownies
Here are some common questions people have about mini brownies:
- Can I use gluten-free flour? Yes! Substitute all-purpose flour with gluten-free flour for a gluten-free version.
- How do I know when my brownies are done? A toothpick inserted in the center should come out with a few moist crumbs.
- Can I add chocolate chips? Absolutely! Fold in chocolate chips for extra richness.
- How do I prevent sticking? Make sure to line your mini brownie pan with parchment paper or use non-stick baking cups.
- Can I use unsweetened chocolate? If you use unsweetened chocolate, you’ll need to adjust the sugar in the recipe.
- What can I use instead of eggs? You can use a flax egg (1 tablespoon flaxseed meal + 3 tablespoons water) or 1/4 cup applesauce as an alternative.
- How do I decorate my brownies? Melt chocolate or white chocolate for drizzling, and consider adding sprinkles or nuts for decoration.
- Can I make mini brownies in advance? Yes! Make the batter ahead of time and bake when you’re ready to serve.
Nutritional Tips and Dietary Adaptations
Want to enjoy your mini brownies guilt-free? Here are some tips for healthier adaptations:
- Lower Sugar: Reduce the brown sugar slightly or substitute with a natural sweetener like honey or maple syrup.
- Whole Wheat Flour: Substitute half of the all-purpose flour with whole wheat flour for added nutrients.
- Protein Boost: Add a scoop of protein powder to the batter for a healthy twist.
- Dairy-Free: Use coconut oil and dairy-free chocolate to make these mini brownies completely dairy-free.
Equipment Recommendations
Here are a few tools that will make your baking experience smoother:
- Mini Brownie Pan: Ideal for creating perfectly sized treats.
- Parchment Paper: Great for lining your pans to prevent sticking.
- Mixing Bowls: A set of mixing bowls in various sizes will help with ingredient prep.
- Silicone Spatula: Perfect for folding in ingredients without overmixing.
Serving Suggestions
Wondering how to present your mini brownies? Here are some delightful serving ideas:
- Individual Treats: Serve each brownie in its paper cup for easy snacking.
- Brownie Sundae: Top with a scoop of ice cream and drizzle with chocolate sauce for a decadent dessert.
- Party Platter: Arrange mini brownies on a serving platter with various toppings for guests to customize their treats.
- Gift Them: Package them in a cute box for a homemade gift that everyone will appreciate!
In conclusion, baking mini brownies is not only a simple process but also a rewarding experience that fills your kitchen with mouth-watering aromas and delights your taste buds. With this comprehensive guide, you’re now equipped with everything you need to bake delicious mini brownies that shine at any event. So roll up your sleeves and get ready to impress your family and friends with these delightful bites!
Mini Brownies
Ingredients
Dried ingredients
- 0.75 cup packed brown sugar
- 0.25 cup butter
- 3 oz semi-sweet chocolate
- 0.5 tsp vanilla
- 1 egg egg
- 0.33 cup flour
- to taste white chocolate (for decoration)
Instructions
- Melt sugar, butter, and chocolate in a saucepan over low heat, stirring until smooth. Remove from heat and cool for 1 minute.
- Stir in vanilla and egg, then fold in flour until just combined.
- Spoon batter into paper cups and bake at 350°F (175°C) for 10-12 minutes. Cool completely.
- Melt white chocolate in a microwave-safe bag and decorate cooled brownies as desired.