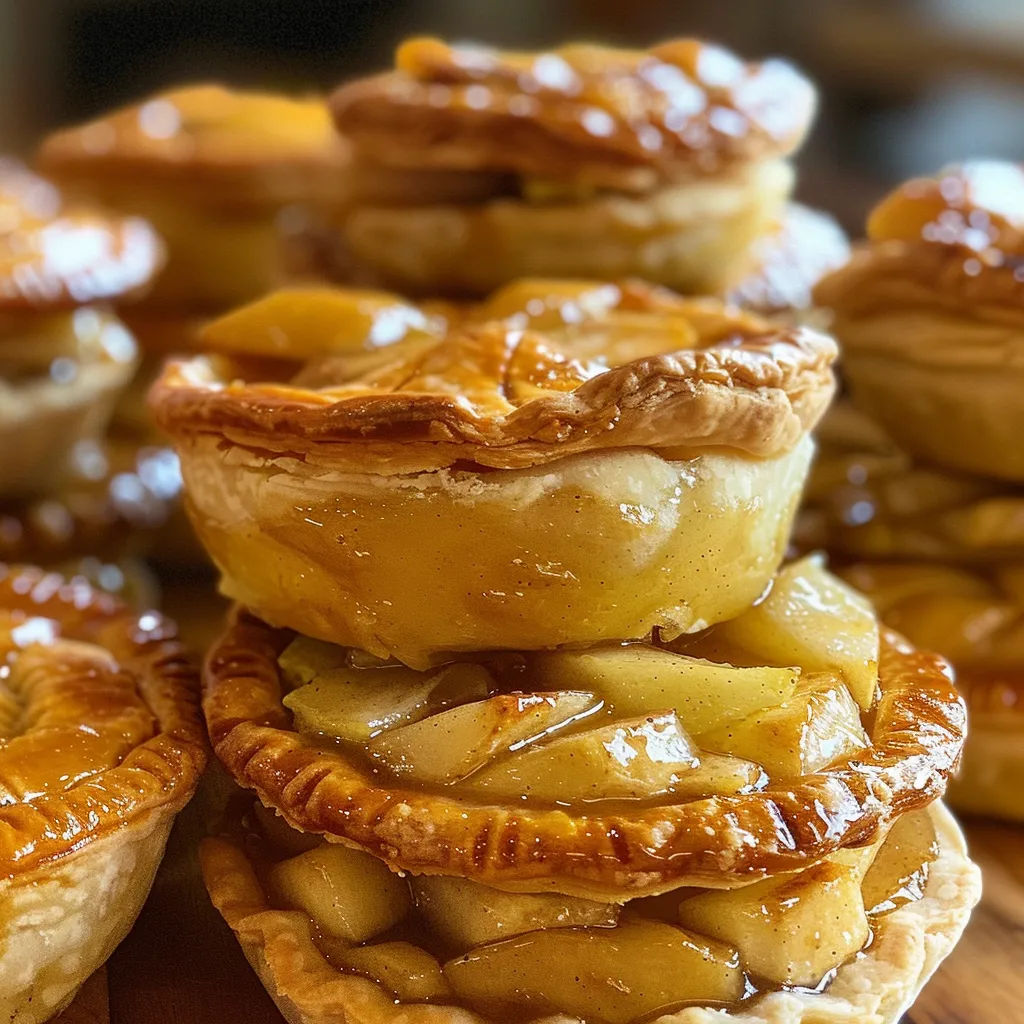
Experience the Joy of Baking with Mini Apple Pies
Welcome, fellow cooking enthusiasts! Today, we’re diving into the delightful world of mini apple pies. These bite-sized treats are not only a feast for the eyes but also a burst of flavor that brings the comfort of homemade desserts to your table. Whether you’re planning a family gathering, a cozy dinner, or just a sweet snack for yourself, this recipe is sure to impress and satisfy. So, let’s roll up our sleeves and whip up some easy mini apple pies that are flaky, sweet, and perfectly portioned!
Why You’ll Love This Recipe
There are countless reasons to adore these mini apple pies. Here are just a few:
- Perfectly Portion-Controlled: Each pie is a single serving, making them ideal for parties or personal indulgence without the guilt of overdoing it.
- Quick and Easy to Make: With simple ingredients and straightforward steps, even novice bakers can create a stunning dessert in no time.
- Flaky, Sweet Crust: The homemade or store-bought crust creates a delightful flaky texture that complements the tender apple filling perfectly.
- Customizable Fillings: Feel free to mix in your favorite spices or even add a twist with different fruits for a unique flavor profile.
- Make-Ahead Convenience: Prepare these pies in advance and freeze them for a quick dessert option whenever the craving strikes.
Ingredients for Easy Mini Apple Pies
Before we begin, let’s gather our ingredients. Here’s what you’ll need:
- 5 medium Granny Smith apples: Peeled and diced for that perfect tartness.
- 1/4 cup of light brown sugar: Adds a rich caramel flavor.
- 1/4 cup of granulated sugar: Balances the tartness of the apples.
- 1/4 cup of all-purpose flour: Helps thicken the filling.
- 1 tsp of ground cinnamon: Adds warmth and depth to the flavor.
- 1 tbsp of lemon juice: Enhances the apple flavor and prevents browning.
- 2 pre-made pie dough rounds (14 ounces total): For those busy days, but feel free to make your own!
Step-by-Step Instructions
Now that we have everything ready, let’s get into the fun part—baking our mini apple pies!
- Preheat the Oven: Set your oven to 425°F (220°C) to ensure it’s hot and ready for baking.
- Prepare the Muffin Pan: Lightly grease a muffin pan with nonstick cooking spray to prevent sticking.
- Mix the Filling: In a large bowl, combine the diced apples, brown sugar, granulated sugar, flour, cinnamon, and lemon juice. Toss until the apples are well-coated, then set aside.
- Roll Out the Dough: On a clean surface, roll out your pie dough until it’s about 1/8-inch thick and roughly 11 inches in diameter.
- Cut and Shape the Dough: Use a large biscuit cutter or round cookie cutter (about 3 1/2 inches in diameter) to cut out 12 circles. Save the scraps for a lattice topping.
- Form the Pies: Press the dough circles into each muffin tin, covering both the bottom and sides.
- Fill the Pies: Divide the apple mixture evenly among the dough cups, piling them high because they will shrink during baking.
- Create the Lattice Topping: Roll out the remaining pie dough and cut it into strips. Lay the strips over the filling to form a lattice pattern, pressing the edges down securely.
- Bake the Pies: Place the muffin tin in the oven and bake for about 20 minutes, or until the crust is golden and the filling is bubbly.
- Cool and Serve: Let the pies cool for 10-15 minutes. Use a butter knife to gently release them from the tin, then transfer to a wire rack or serving dish.
Pro Tips for Perfect Mini Apple Pies
To ensure your mini apple pies turn out beautifully every time, keep these expert tips in mind:
- Use the Right Apples: Granny Smith apples are ideal due to their tartness, but you can mix in Honeycrisp or Fuji for added sweetness.
- Don’t Overfill: Leave some space at the top of each pie to allow for bubbling and expansion as they bake.
- Chill the Dough: If using homemade dough, chill it for at least 30 minutes to prevent it from shrinking during baking.
- Brush with Egg Wash: For a beautiful golden finish, brush the tops of the pies with an egg wash (1 beaten egg) before baking.
- Experiment with Spices: Don’t hesitate to add nutmeg or ginger for an extra flavor kick.
- Check for Doneness: The pies should be golden brown; if they’re browning too quickly, cover them with foil.
- Let Them Rest: Allow the pies to cool completely before serving to let the filling set.
- Try Different Toppings: Serve with whipped cream, vanilla ice cream, or a drizzle of caramel for an indulgent treat.
Common Mistakes and Troubleshooting
Even the best bakers have their mishaps. Here are some common mistakes to avoid:
- Using Too Much Sugar: Adjust the sugar based on the sweetness of your apples to avoid overly sweet pies.
- Not Preheating the Oven: Always preheat your oven to ensure even baking.
- Skipping the Flour: The flour helps absorb excess moisture; don’t leave it out!
- Overbaking: Keep an eye on your pies to prevent them from burning; every oven is different.
Delicious Variations
Feel free to switch things up with these tasty variations:
- Caramel Apple Mini Pies: Drizzle caramel sauce over the apple filling before adding the lattice topping for a sweet surprise.
- Cherry Mini Pies: Substitute half of the apples with fresh or frozen cherries for a fruity twist.
- Spiced Rum Apples: Add a tablespoon of spiced rum to the filling for a boozy upgrade.
- Nutty Crunch Topping: Sprinkle chopped nuts over the lattice before baking for added texture and flavor.
Storage and Make-Ahead Instructions
Want to prepare your mini apple pies in advance? Here’s how:
- Refrigerator Storage: Store baked pies in an airtight container in the fridge for up to 3 days.
- Freezing Pies: Freeze unbaked mini apple pies by wrapping them tightly in plastic wrap, then foil. They’ll keep for up to 3 months. Bake directly from the freezer, adding a few extra minutes to the baking time.
- Make-Ahead Filling: Prepare the apple filling a day ahead and store it in the fridge. Just assemble and bake when you’re ready!
Frequently Asked Questions
Here are some common questions about making mini apple pies:
- Can I use other types of apples? Absolutely! Feel free to mix varieties like Honeycrisp or Fuji for a sweeter taste.
- How do I prevent a soggy crust? Make sure to use enough flour in the filling and avoid overfilling the pies.
- What’s the best way to reheat leftovers? Reheat in a toaster oven or regular oven for a few minutes to restore the crispiness.
- Can I make these mini pies gluten-free? Yes! Use gluten-free pie crust and flour alternatives for the filling.
- How do I make mini apple pie without a muffin tin? Use a mini pie pan or tartlet pans instead.
- What should I serve with mini apple pies? They pair wonderfully with vanilla ice cream, whipped cream, or a drizzle of caramel sauce.
- Can I make these pies vegan? Yes! Substitute butter with coconut oil or vegan butter and use a non-dairy milk alternative.
- How long do these mini pies last? They can be stored in the refrigerator for up to 3 days.
Nutritional Information and Dietary Adaptations
These mini apple pies can fit into various dietary needs:
- Caloric Content: Each mini pie roughly contains 200 calories, depending on ingredients.
- Low-Sugar Options: Use less sugar and opt for natural sweeteners like honey or maple syrup.
- Gluten-Free Alternatives: Use gluten-free flour and pre-made pie crusts.
Essential Equipment Recommendations
To ensure your baking experience is seamless, here’s what you’ll need:
- Muffin Tin: A standard 12-cup muffin tin is essential for shaping your pies.
- Biscuit Cutter: For cutting perfect dough circles.
- Mixing Bowls: A large bowl for mixing the filling and a smaller bowl for any toppings.
- Rolling Pin: To roll out your dough to the right thickness.
Serving Suggestions
When it comes to serving your mini apple pies, get creative! Here are some ideas:
- Warm with Ice Cream: Serve them warm with a generous scoop of vanilla ice cream for a comforting dessert.
- Drizzle of Caramel: Add a drizzle of caramel sauce for an extra touch of sweetness.
- Dusting of Powdered Sugar: A light dusting of powdered sugar adds a lovely finish.
Now that you have mastered the art of making mini apple pies, I hope you feel empowered to try this recipe in your own kitchen. Don’t hesitate to experiment and make it your own! Remember, cooking is all about joy and creativity—so have fun with it! Happy baking!
Easy Mini Apple Pies Flaky, Sweet Perfectly Bite Sized
Ingredients
Fruits and Fillings
- 5 medium Granny Smith apples peeled and diced
- 0.25 cup light brown sugar
- 0.25 cup granulated sugar
- 0.25 cup all-purpose flour
- 1 tsp ground cinnamon
- 1 tbsp lemon juice
Pie Dough
- 2 rounds pre-made pie dough rounds (14 oz total) (or homemade crust)
Instructions
- Preheat oven to 425°F (220°C). Grease muffin tin.
- Mix diced apples, sugars, flour, cinnamon, and lemon juice until coated.
- Roll out pie dough, cut 12 circles (~3.5 inches diameter), and press into muffin cups.
- Divide apple filling into each crust, then cut strips for lattice top and assemble.
- Bake for 20 minutes until golden and bubbly. Cool for 10-15 minutes before serving.