Indulge in the Joy of Chocolate Cheesecake Dessert Cups
Welcome to your new favorite dessert! These Chocolate Cheesecake Dessert Cups are a delightful blend of creamy cheesecake and rich chocolate pudding, all layered perfectly in individual servings. If you’re looking to impress guests or simply satisfy your sweet tooth, this recipe will become a staple in your kitchen. Let’s dive into why you’ll love this easy-to-make dessert and how to create it step by step!
Why You’ll Love This Recipe
- Effortless Elegance: With minimal ingredients and no baking required, you can whip up these dessert cups in no time.
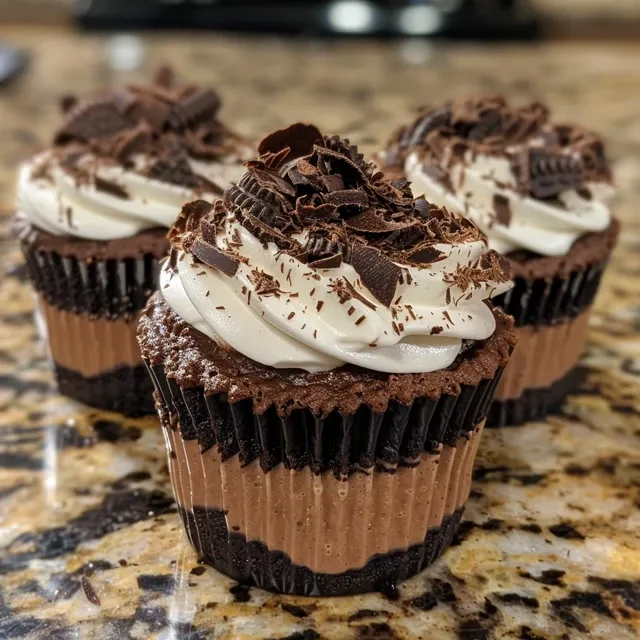
- Layered Perfection: The combination of Oreo crust, creamy cheesecake mixture, and chocolate pudding creates a visually stunning presentation.
- Customizable: You can easily adapt the recipe to suit your taste preferences with various toppings and flavors.
- Make-Ahead Friendly: Prepare these cups in advance and store them in the fridge for a stress-free dessert option.
- Kid-Approved: These dessert cups are a hit with both kids and adults, making them perfect for parties or family gatherings.
Ingredients Breakdown
Here’s what you’ll need to create your Chocolate Cheesecake Dessert Cups:
- 10 Oreo cookies, finely crushed: This base adds a delightful crunch. For a gluten-free option, use gluten-free cookies.
- 4 ounces cream cheese, softened: Ensure it’s at room temperature for easy mixing; you can substitute with mascarpone for a richer flavor.
- ¼ cup unsalted butter, softened: For added creaminess; you can use salted butter but reduce added salt.
- 1 cup powdered sugar: This sweetens the cheesecake mixture; feel free to adjust based on your sweetness preference.
- 4 ounces Cool Whip: This adds fluffiness; you can replace it with homemade whipped cream if you prefer.
- 2 cups prepared chocolate pudding: Use store-bought or homemade; choose a high-quality chocolate pudding for the best flavor.
- ½ cup whipped topping, for garnish: This adds a light and airy finish.
- 2 tablespoons chocolate shavings, for garnish: Elevate your dessert with some elegant chocolate decor.
Making the Chocolate Cheesecake Dessert Cups
Follow these simple steps to create your dessert cups:
- Press the crushed Oreos into the bottom of four one-cup serving glasses.
- In a medium bowl, beat the cream cheese and butter together until creamy.
- Turn the mixer to low and add the powdered sugar until completely combined. Fold in the Cool Whip.
- Pipe or spread the cheesecake mixture over the Oreo crust in each glass.
- Spoon an even portion of chocolate pudding over the cheesecake mixture, then top each with whipped topping and chocolate shavings.
- Refrigerate for about 30 minutes before serving to let the flavors meld and the cups chill.
Pro Tips for Perfect Dessert Cups
- Room Temperature Ingredients: Ensure your cream cheese and butter are at room temperature for easy mixing and a smooth texture.
- Chill Time: Allowing the dessert cups to chill for at least 30 minutes enhances the flavors and makes them easier to serve.
- Use a Piping Bag: For a professional touch, use a piping bag to layer the cheesecake mixture; it creates a beautiful presentation.
- Quality Ingredients: Use high-quality chocolate pudding and fresh cream cheese for the best flavor.
- Experiment with Flavors: Try adding a dash of vanilla extract or a hint of coffee to the cheesecake mixture for a unique twist.
- Garnishing: Get creative with garnishes! Consider using fresh berries, crushed nuts, or even a drizzle of caramel.
- Serving Size: Adjust the portion sizes based on your preference; these cups are rich, so smaller servings can be satisfying.
- Storage Tips: Keep any leftovers covered in the fridge for up to 3 days. The flavors only get better!
Common Mistakes and Troubleshooting
Here are some common pitfalls to avoid:
- Overmixing the Cheesecake Mixture: This can lead to a dense texture; mix just until combined.
- Not Chilling Long Enough: If you serve the dessert cups too soon, they may be too soft. Allow adequate chilling time.
- Ignoring Ingredient Temperatures: Using cold ingredients can result in a lumpy mixture. Always bring dairy ingredients to room temperature.
- Skipping the Garnish: Garnishes add visual appeal and enhance flavor; don’t skip this step!
Variations to Try
Here are some fun variations to keep things exciting:
- Fruit-Filled Cups: Add a layer of fresh fruit, such as strawberries or raspberries, between the cheesecake and pudding layers.
- Nutty Crunch: Mix crushed nuts like pecans or walnuts into the Oreo crust for added crunch.
- Mint Chocolate: Add a few drops of peppermint extract to the cheesecake mixture for a refreshing twist.
- Caramel Drizzle: Drizzle caramel sauce over the top for a sweet contrast to the chocolate.
Storage and Make-Ahead Instructions
You can prepare these dessert cups up to 2 days in advance. Simply cover the cups with plastic wrap and store them in the fridge. The flavors will meld beautifully over time!
Frequently Asked Questions
- Can I use homemade whipped cream instead of Cool Whip? Yes, homemade whipped cream works great for a fresher taste!
- How long can I store these dessert cups? They can be stored in the fridge for up to 3 days, covered.
- Can I make this recipe gluten-free? Absolutely! Use gluten-free cookies for the crust.
- What can I use instead of cream cheese? Mascarpone cheese is a delicious alternative.
- Can I freeze these dessert cups? While not recommended, you can freeze the cheesecake layer separately and then layer it with pudding when ready to serve.
- What other toppings can I use? Get creative! Crushed cookies, fresh fruit, or chocolate sauce all make great toppings.
- How do I know when the dessert cups are ready to serve? They should be chilled and firm to the touch, with layers set.
- Can I double this recipe? Absolutely! Just ensure you have enough serving glasses and adjust the chilling time if needed.
Nutritional Information and Dietary Adaptations
Each serving of these chocolate cheesecake dessert cups contains approximately 300 calories, with a good balance of fats and carbohydrates. If you’re looking to make this recipe lighter, consider the following adaptations:
- Low-Fat Cream Cheese: Use low-fat cream cheese for a healthier alternative.
- Reduced Sugar: Substitute some of the powdered sugar with a sugar alternative like stevia or erythritol.
- Non-Dairy Options: Use non-dairy cream cheese and whipped topping to make this dessert vegan-friendly.
Essential Equipment for Success
To make the preparation process smooth, here’s a list of essential tools:
- Mixing Bowls: A medium bowl for mixing the cheesecake and a larger one for the pudding.
- Electric Mixer: For achieving that creamy texture in the cheesecake mixture.
- Piping Bag: For neatly layering the cheesecake mixture.
- Measuring Cups and Spoons: Accurate measurements are key to successful baking.
- Serving Glasses: Clear glasses showcase the beautiful layers of your dessert.
Serving Suggestions
To serve these delightful dessert cups, consider the following ideas:
- Family Gatherings: Perfect for potlucks or family dinners where everyone can enjoy their own cup.
- Celebrations: Ideal for birthdays, anniversaries, or any special occasion where a sweet touch is needed.
- Picnics and Outdoor Events: Easy to transport and serve; just pack them in a cooler with ice packs.
In conclusion, creating these Chocolate Cheesecake Dessert Cups is not only easy but a fun way to engage with friends and family over delicious food. Remember, cooking should be enjoyable and relaxed. So grab your ingredients, follow these steps, and let your culinary creativity shine. Happy cooking!
Chocolate Cheesecake Dessert Cups Recipe
Ingredients
Crust
- 10 cookies Oreo cookies, finely crushed
- 4 ounces cream cheese
- ¼ cup unsalted butter, softened
- 1 cup powdered sugar
- 4 ounces Cool Whip
- 2 cups prepared chocolate pudding
- ½ cup whipped topping
Garnish
- 2 tablespoons chocolate shavings (for garnish)
Instructions
- Press crushed Oreos into the bottom of four serving glasses.
- Beat cream cheese and butter until creamy, then mix in powdered sugar.
- Fold in Cool Whip and spread over Oreo crusts.
- Spoon chocolate pudding over the cheesecake layer, then top with whipped topping and chocolate shavings.
- Refrigerate for 30 minutes before serving.